| EZcube |
| EZcube |
|
|
|
|
|
|
|
Focus and diffuse lighting Eliminating shadows Daylight color bulbs |
Exposure for a
white background Example gallery of images Coin photography tools |
|
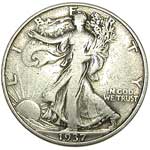
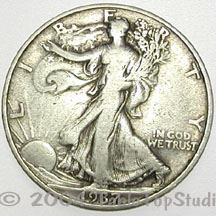
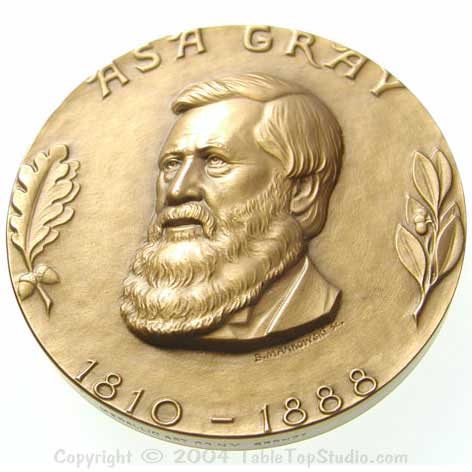
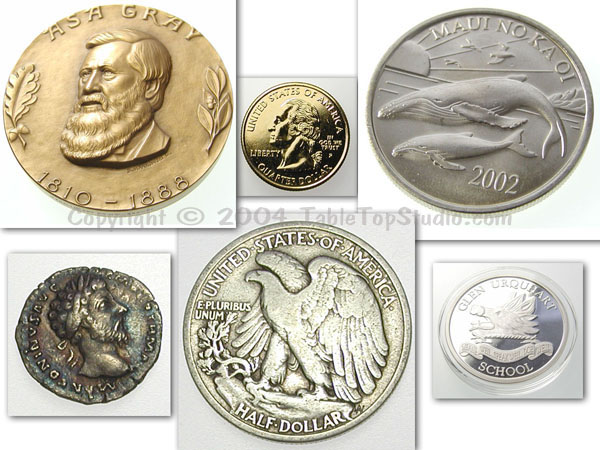
Taking good quality pictures of coins can seem intimidating. However, there are some simple techniques which even amateur photographers can use to obtain dramatic results with minimal effort. The following examples show the basic setup that should allow anyone to achieve results they can be proud of. These images were all taken using an inexpensive two megapixel digital camera. To simplify our setup we used an EZcoin™ Pro Studio kit with an illuminated flat panel to provide a completely, clean, shadow free background. We used an inexpensive desk lamp as the light source, replacing the bulb with a true color daylight balanced compact fluorescent bulb as the main light source. (More details on the equipment can be found at the end of this page). The keys to good coin photography are focus and lighting. In order to capture the most detail you will need to get your camera close to the coin. This means you will need to use a camera that has the ability to focus on very close objects (professional photographers call this macro focus). Most digital cameras allow for focusing at less than 12" and some allow the object to be as close as 2" and still be in focus. You should consult your camera's users manual to see how close your camera can actually focus. Keep in mind that in order to focus close, the camera will need to be in "macro mode" and the zoom will need to be set to a medium or wide angle (again you will need to consult your camera's users manual to find the correct settings). Make sure you don't position the camera so the coin is closer than the minimum focusing distance of your camera, otherwise the image will never be in focus. And while you have your camera's manual out you should find out how to put the camera in "spot focus" mode. The normal focus mode of most digital cameras is some sort of average focus mode. That means that the camera will try to look at an area and base the focus on an area of what it sees. It's better for close up photography to put the camera into spot focus mode, this will allow you to see exactly what the camera will be focusing on. Getting the camera to focus properly on the coin entails some effort, but the results should be worth it. A final word on focus. The above steps assume that you are using your camera's auto focus feature. However, ff you have followed the above steps (don't get closer than the minimum focus distance, set the camera to macro mode, and use spot focus) and you still have trouble getting the coin in focus, try focusing you camera manually. You may find that with your camera manual focus, is faster and more dependable than auto focus. A couple of words about tripods/copystands and close-up photography. Use one. As you get closer to an object any motion of the camera is greatly magnified. Even a surgeon probably doesn't have hands steady enough to take a good coin photo without using a tripod or copystand. A sturdy tripod or copystand is essential for sharp images. We mentioned above that the other key to good coin photography is the lighting. You have probably already discovered that unless you are using a special ring flash, an on-camera flash does not lead to good coin photos. Not only is the camera's flash too bright at such a close distance, but it is probably in the wrong position to actually light up the coin properly. On camera flashes were designed for medium range shots, not extreme close-ups. The good news is that because the camera is so close to the coin and because you are using a tripod, you can use a relatively weak light for coin photography. We prefer daylight balanced compact fluorescent bulbs. Not only do they provide nice natural colored light, but they produce very little heat so they can be left on for long photo sessions without heating the coin, the camera or the photographer. Compact fluorescent bulbs fit in standard light fixtures, so a simple adjustable desk lamp fitted with a daylight balanced compact fluorescent bulb makes an excellent (and very low cost) light source for coin photography. (If you can't locate a daylight balanced compact fluorescent bulb, you can use a standard 60 watt light bulb. However you will need to compensate for the yellowish color cast it will produce. You can compensate for the color either with your camera's white balance (WB) setting or with imaging software).
Now lets look at some specific situations. |
|
|
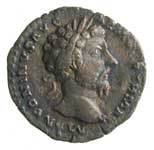
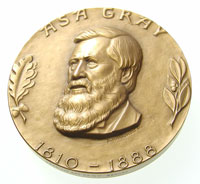
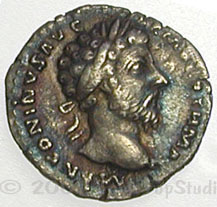
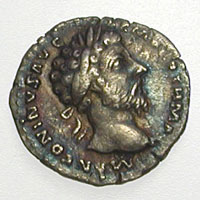
A shadowless image of an ancient coin on a
light panel |
||
|
|
|
|
 |
|
|
| Slightly rotated/poor alignment |
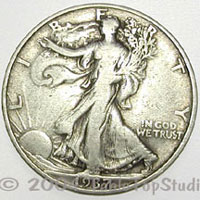
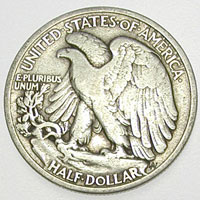
Obverse |
Reverse |
Even
amateur photographers can obtain dramatic results with minimal effort.
Below images were cropped, but otherwise unaltered and were
taken using an
inexpensive 2 mega pixel camera.
|
|
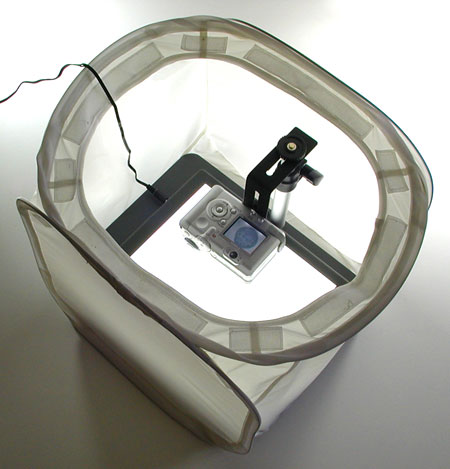
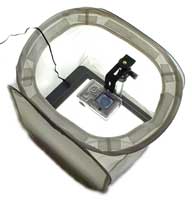
EZcube®
light tent
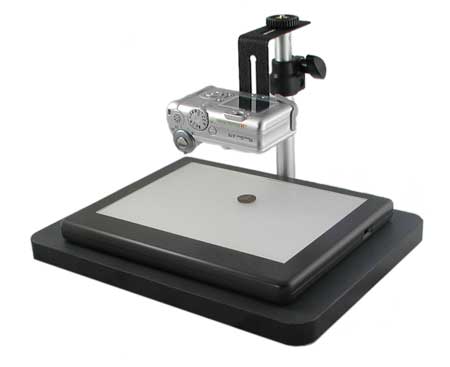
Small Copystand
Illuminated
flat panel
Compact Fluorescent Bulb |
 |
|
|
 |
|
|
|
|
|
|
|
Copyright © 2008 TableTop Studio LLC. All rights reserved.