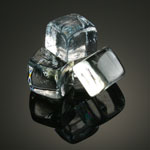
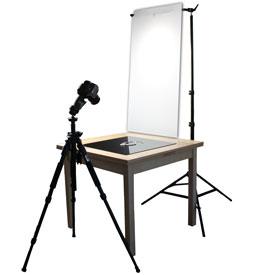
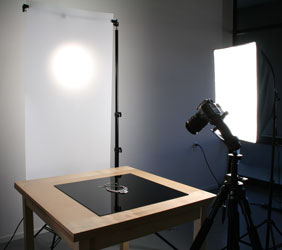
Using high gloss black acrylic or black glass for photography... Professional photographers will use black glass to achieve this effect shown below, but high gloss black acrylic can be used in place of real glass for a safer setup. By looking at the setup below, the results are somewaht unexpected. The very shiny black background resembles a softly airbrushed background in the final image, instead of a reflective mirror. |
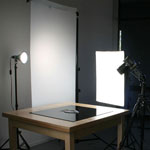
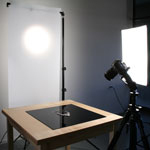
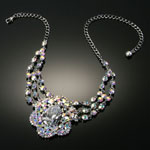
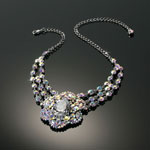
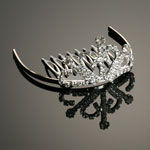
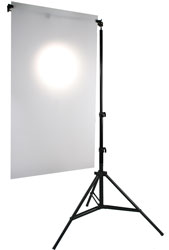
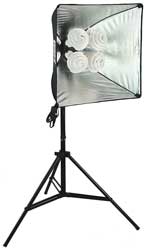
The primary light source for the necklace shown, was positioned on the side of the table, facing downward toward the jewelry and table surface. A single soft box was used to soften the primary light source and prevent glare and hotspots on the surface of the crystals. We used one single 20" x 20" Kuhl Lite 120 soft box for this. This light holds four 30 Watt The large acrylic sheet used, has a protective sheet on both sides; we highly recommend leaving the second side covered with the protective sheeting until you intend to use it. The acrylic does scratch easily, so dragging jewelry across the surface is to be avoided when at all possible. Glass is more durable and can be used instead of acrylic; however it is more hazardous to work with due to the fragile nature of glass. This technique works especially well for jewelry that lies flat like the necklace shown. Because this is an open set and the black acrylic is highly reflective, it will take some patience to line things up just right so the acrylic is not reflecting things you do not wish to see in your image. If you have the opportunity to work in an area with high ceilings, that helps to reduce the overhead reflections a bit. Be sure to keep looking through the camera lens after repositioning any part of the setup. Unwanted reflections have a way of sneaking in just when you think you're all set. Be sure that all of your lights match in color or you will not be happy with the results. NEVER mix different light source bulb colors. I use all 5000K daylight balanced bulbs for all of my example images. |
 compact flourescent bulbs, putting out a substantial amount of light, which allows you to shoot with your camera set to a faster shutter speed.
"Black Ice" Jewelry Photography Equipment The equipment shown here works great for taking pictures of jewelry in the specific style shown above. This is a very popular style of photography seen often in high end fashion magazines. |
|
23"x 23" Black Acrylic 8' Heavy duty stand with arm |
 |
|
 |
 |
Copyright © 2010 TableTop Studio LLC. All rights reserved.